Camping
How to Seam Seal Silnylon Tarps and Tents
Seam sealing silicone/silnylon tarps and shelters terrifies many people. However, it’s one of the easiest things you can do.
A few ground rules:
- Seal the outside. That’s where the rain will fall and you need to seal the stitching there to repeal water ingress.
- Monitor the temperature. 60 degrees Fahrenheit/15 degrees Celsius is the ideal temperature to seal up your shelter. Also be sure it's not too high in humidity (below 80%).
- Make sure the shelter is pitched tight and defect free before you start to seal it.
Now to seal that shelter!
You will need:
- A brush
- Cup/tin or something to mix up in
- A bit of card, or a steady hand
- Damp cloth
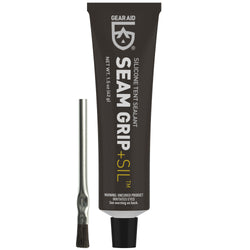
- Seam Grip SIL Silicone Tent Sealant
- Mineral spirits
Start by cleaning the seams with rubbing alcohol and allow to dry. Then mix a little Mineral Spirits in a tin with Seam Grip SIL until it is a workable viscous paste. This will make sure it’s easily applied and rubbed into the seams. The whole point is to get it to soaking into the stitching where the water could penetrate.
Brush in the thinned mix carefully and use the damp cloth to mop up any spills. You can use a cut out template to help reduce spills. Rub your finger over it to help push it into the seams and then leave to cure, working a 3 to 4-inch area in one go. As the Seam Grip SIL is thinned it will soak in and look neat after it dries. Check after an hour or so to spot missed areas.
On high stress areas like the tieouts; add neat dabs of Seam Grip SIL to reinforce those areas. Then allow 24 hours to fully dry. To eliminate any tackiness apply baby powder or corn starch. Then tuck away and on your next trip sleep well, not worrying about water ingress into your shelter.
This tip was contributed by trail ambassador Martin Rye via gossamergear.com.